Charles Miller is a veteran bike enthusiast with over 12 years of experience dealing with bikes as a mechanic. Despite immense love and expertise for...
Did you know that removing the rear wheel of an electric bike involves more than just releasing a few bolts? It's true, and while it may seem daunting, it's a skill you can certainly master.
It includes tasks such as detaching the rear brake, handling the hub motor, and reassembling everything in the right order. It's not just about getting the wheel off, but ensuring your e-bike runs smoothly afterwards.
Stick around, as we're about to unfold the step-by-step process that will make this task a breeze for you.
Key Takeaways
- It is important to have the necessary tools and safety precautions in place before attempting to remove the rear wheel on an electric bike.
- Handling power surges and using the emergency brake correctly is crucial for the safety of both the rider and the bike during maintenance.
- Detaching the bike's rear brake and handling the hub motor requires careful attention to detail and proper positioning to avoid damage.
- Reinstalling the rear wheel and aligning the power cable correctly are essential for the bike to function properly and ensure efficient power transmission.
Gathering Necessary Tools
Before you start the process of removing the rear wheel on your electric bike, let's make sure you've got all the necessary tools at hand. It's not as daunting as it may seem, and with the right tools, you'll feel like a seasoned pro.
First, you'll need a set of Allen keys. These are crucial for loosening and removing screws.
Next, get a set of tyre levers. They're perfect for prying the tyre away from the rim.
Don't forget a pump to re-inflate your tyre once you're done.
You'll also need a wrench to remove the nuts on the wheel.
Lastly, a bike stand isn't necessary, but it can make the job easier by keeping your electric bike upright and stable.
E-bike Safety Precautions
Before you tinker with your e-bike's rear wheel, let's focus on some safety precautions.
Always perform pre-ride checks to ensure your brakes, lights, and tires are working perfectly.
Be aware of how to handle power surges and use emergency brakes, as these skills could be lifesaving, especially during maintenance.
Pre-ride Safety Checks
Conducting a thorough inspection of your electric bike before each ride is crucial for your safety. Here are some key steps to follow:
- Check the tire pressure to ensure it is at the recommended level.
- Look for any signs of wear or damage on the tires.
- Ensure the brakes are responsive and there is no excessive wear on the brake pads.
It is also important to understand the process of removing the rear wheel on an electric bike, as this is an essential maintenance skill. Take the time to learn and practice this procedure.
In addition to these checks, don't forget to examine the battery. Make sure it is securely attached and fully charged. This will ensure that you have enough power for your ride.
Confirm that your lights and reflectors are functioning well for optimal visibility. This is especially important if you plan to ride in low light conditions.
Lastly, inspect the frame, handlebars, and other crucial components for stability. Look for any signs of cracks or loose parts that may affect your ride.
Handling Power Surges
In the quest for a safe and seamless e-bike ride, it's crucial to know how to handle potential power surges. This skill involves not only wearing the right protective gear such as a helmet, gloves, and eye protection, but also being ready to swiftly reduce speed and power output should a surge occur unexpectedly.
Consider these precautions:
- Regularly inspect the rear tire and the torque sensor, as they play significant roles in managing power and speed.
- Maintain your e-bike's battery and wiring to prevent potential surges.
- Stay alert to your surroundings to anticipate and react to any hazards.
- If you're experiencing frequent power surges, don't hesitate to consult a professional.
Emergency Brake Usage
Getting to grips with the emergency brake on your e-bike is an essential safety precaution that you shouldn't overlook. This feature is designed to be your savior in emergency situations. Familiarize yourself with the emergency brake's location and function. Practice using it in a safe, controlled environment before hitting the road.
The emergency brake usage is more than a backup plan; it's a vital part of your e-bike's safety system. However, don't rely solely on it. Regular maintenance and inspection of your brake pads are crucial to ensure optimum performance. Remember, safe riding practices must always be a priority.
Understanding the limitations of the emergency brake is as important as knowing how to use it.
Detaching Bike's Rear Brake
Next, you'll need to tackle the rear brake's detachment.
Begin by removing the end cap to expose the rear brake mechanism.
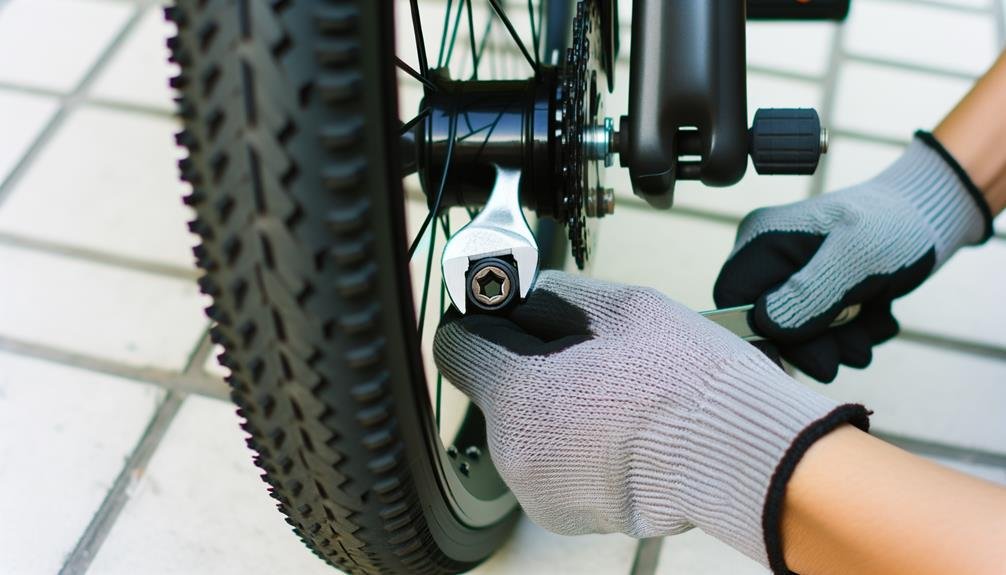
Then, loosen and take off the nut with the fitting tool.
It's crucial to keep track of the order in which you remove the washers for a smooth reassembly later on.
Brake Release Procedure
Before you proceed with the removal of the rear wheel, it's crucial to first release the bike's rear brake by firmly squeezing the brake lever and holding it in position. This brake release procedure is fundamental to ensure a smooth and damage-free wheel removal process.
Here's the detailed brake release procedure:
- Squeeze the brake lever firmly and maintain the position.
- Use a 5mm allen key to loosen the brake cable anchor bolt.
- Carefully detach the brake cable from the brake caliper and secure it out of the way to avoid any potential damage.
- Remove the rear wheel, making sure the brake rotor clears the brake caliper.
Keep track of each component's order for smooth reassembly. By following this procedure, you'll feel more confident and part of a community of knowledgeable cyclists.
Managing Brake Cables
In the process of removing your bike's rear wheel, it's essential to handle the brake cables with care to avoid any damage or complications. Start by loosening the bolt holding the brake cable to the frame. Use a size 19 wrench or Allen key, working on one side at a time. Carefully detach the cable, making sure it doesn't get tangled or damaged.
If necessary, use zip ties to secure the cable to the frame, keeping it out of the way. Be mindful of the original position and routing of the cable to ensure proper reattachment. Remember to keep track of any washers or spacers that may have been around the cable for reassembly.
Your electric bike deserves this level of attention to detail.
Loosening the Rear Wheel

To effectively loosen the rear wheel on your electric bike, start by stabilizing the bike with proper braces when it's flipped over, paying careful attention to the order of the washers as you remove them. This is crucial because the last thing you want is to mix up the washer order when putting the wheel back on.
Here's a brief, step-by-step process to guide you:
- First, ensure the bike is stable and secure before you begin loosening the rear wheel.
- Next, carefully remove the washers, remembering the order in which they were positioned for easy reassembly.
- Consider removing the derailleur if you're finding it hard to access the wheel.
- Finally, gently tap and tilt the wheel to create space for its removal.
The process of loosening the rear wheel is all about precision and patience. If you're struggling to remove the wheel, don't force it. Instead, try to identify what might be obstructing it and address that issue.
Removing the Rear Wheel
With your electric bike stabilized and the necessary tools at hand, you're ready to dive into the task of removing the rear wheel. The next thing you'll do is to remove the cap at the end of the rear wheel. Take care to note the order in which you remove the washers, as this will be crucial when reassembling.
Cut the zap strap holding the motor cable to the frame. You might find it easier to remove the derailleur at this stage, but it's not essential. You're now ready to remove the nut and washers from both sides of the axle. Be sure to position the washer with a tooth correctly in the frame.
When replacing the rear tire, align the power cable with the tooth and ensure the disc lines up with the brake calipers. This is the final step in removing the rear wheel.
| Step | Description |
|---|---|
| 1 | Remove end cap |
| 2 | Cut zap strap |
| 3 | Remove derailleur (optional) |
| 4 | Remove nut and washers |
| 5 | Align power cable and disc |
Follow these steps, and you'll be back in the saddle in no time, part of the electric bike community once more.
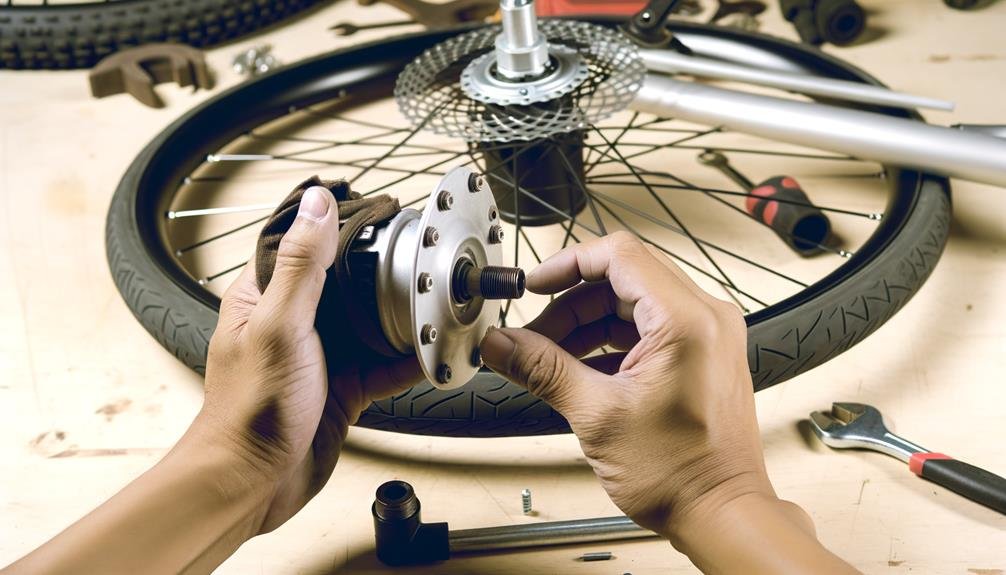
Handling the Hub Motor

Handling your bike's hub motor requires a gentle touch, as you don't want to damage the delicate internal components. It's crucial not to rush this process. Be sure to create plenty of space around the bike, giving you much room to work without any obstacles.
Here are few things to keep in mind when handling the hub motor:
- You don't need to cut any wires or cables. Be careful not to twist or pull on the motor cable, as this can cause damage.
- Positioning is key. Make sure your bike is in a position that doesn't put excessive pressure on the hub motor.
- Remember how the motor cable was routed. When you replace the rear tire, you'll need to ensure it's correctly repositioned.
- Keep the electrical connectors clean. Avoid exposing them to elements like dirt, water, or other contaminants.
Reinstalling the Rear Wheel
After ensuring the hub motor is properly handled and secured, you're now ready to focus on reinstalling the rear wheel of your electric bike. This task can be much easier if you simply follow these steps in order, ensuring your bike is safe and ready for use.
Initially, align the wheel with the dropouts and insert the axle. Make sure you take care to fit it securely. This is a crucial step as it'll ensure the wheel is firmly attached and reduces the risk of accidents.
Then, slide the chain onto the smallest sprocket before fully inserting the axle. This simple move will make the next steps go smoother.
| Steps | Details | Importance |
|---|---|---|
| Align wheel & insert axle | Ensure secure fit | Reduces risk of accidents |
| Slide chain onto sprocket | Before fully inserting axle | Makes next steps easier |
| Place washers & nuts | On both sides of axle | Secures axle |
| Check wheel alignment | Adjust if necessary | Ensures proper functioning |
Frequently Asked Questions
How Do You Take the Back Wheel off an Electric Bike?
In wheel maintenance practices, you'll have to stabilize your electric bike upside down. Remove the end cap, note washer sequence, tap out the tire gently. Don't forget your electric bike troubleshooting: realign carefully while replacing.
How Do You Release the Back Wheel on a Bike?
You'll first need to disconnect the rear brake. Recognize the wheel maintenance's importance for a smooth ride. Next, carefully unscrew the axle nuts. Now, you're ready to gently release the wheel from the bike frame.
How Do You Remove a Bike Wheel Without Quick Release?
To remove a bike wheel without quick release, you'll need the right tools. Safety is paramount, so don't rush. Use a wrench to loosen the nuts on both sides of the axle, then gently remove the wheel.
How Do You Remove the Rear Wheel of a Gear Cycle?
You'll need some gear maintenance tips to remove your cycle's rear wheel. Understand your cycle wheel anatomy, then use the right tools to loosen and remove the necessary parts. Carefully lift out the wheel.
Conclusion
After a meticulous dance with bolts, washers, and cables, you've successfully navigated the labyrinth of your e-bike's rear wheel removal. Now, with the wheel reinstalled and your bike standing proud, every element is back in harmonious alignment.
Before you mount your steed and take off into the sunset, give all parts a final check – ensuring tightness and correctness. This careful attention to detail is your passport to countless miles of smooth, worry-free journeys.
Ride on, intrepid explorer, the road awaits!

Charles Miller is a veteran bike enthusiast with over 12 years of experience dealing with bikes as a mechanic. Despite immense love and expertise for his Tacoma, he rides his Trek Ebike more. Anytime you meet him, you’ll either hear him talking about Bikes, or writing about all things bikes and cars on this blog.
More Posts


