Charles Miller is a veteran bike enthusiast with over 12 years of experience dealing with bikes as a mechanic. Despite immense love and expertise for...
In the realm of electric bike maintenance, one may occasionally find themselves needing to 'take off the dancing shoes' of their eco-friendly steed, so to speak. This refers, of course, to the process of removing the rear wheel of the bike.
We're here to guide you step-by-step through this procedure, ensuring you're armed with the knowledge to tackle this task with confidence. From the necessary tools to safety precautions, right through to understanding the bike's structure and the actual removal process, we've got you covered.
But removing the wheel is only half the battle, isn't it? What happens after you've successfully removed the wheel? Well, stick with us to find out.
- Key Takeaways
- Gather Necessary Tools
- Safety Precautions Before Starting
- Understanding the Electric Bike Structure
- Identifying the Rear Wheel
- Easing the Tension off Chain
- Disconnecting the Electric Motor
- Removing the Wheel Nuts
- Taking off the Rear Wheel
- Checking for Potential Issues
- Reinstalling the Wheel Correctly
- Frequently Asked Questions
- Conclusion
Key Takeaways
- Proper tools and safety precautions, such as wrenches, tire levers, and protective gear, are necessary for removing the rear wheel on an electric bike.
- Understanding the structure of the electric bike, including the battery placement, motor connection, and alignment of the brake disc, is essential for removing the rear wheel.
- The rear wheel can be identified by its location behind the seat, thicker axle, and the presence of a cassette or freewheel, disc brake rotor, and chain.
- To remove the rear wheel, it is important to shift gears, create slack in the chain, disconnect the motor cable, and carefully remove the wheel nuts before lifting the wheel out.
Gather Necessary Tools
Before we dive into the removal process, let's ensure we've gathered all the necessary tools including a wrench set, tire levers, and an air pump. We're part of a community that takes pride in maintaining our electric bikes, so we can't overlook the importance of preparation.
Let's start with the wrench set. We'll need a couple of sizes, but make sure to include a 13 mm wrench, as it's common for most electric bike wheel nuts. Our wrench should be capable of delivering up to 30 newton meters of torque to ensure the nuts are tightly secured.
Next, we'll need a set of tire levers. These are crucial for prying off the tire from the rim without damaging either. A pair of sturdy plastic levers will do the trick, ensuring we don't scratch or dent our rims in the process.
Finally, we can't forget our trusty air pump. After we've successfully removed and replaced the rear wheel, we'll need to inflate the tire to the correct pressure. Remember, over or under-inflating can affect our bike's performance and safety.
With these tools in hand, we're ready to venture into our removal process.
Safety Precautions Before Starting
With our tools all set, let's now focus on the crucial aspect of safety to ensure we're protected throughout the rear wheel removal process.
First off, make sure you take the necessary steps to protect yourself. Donning protective gloves and safety glasses is a must to keep our hands and eyes safe from any sharp edges or debris.
Next, we need to ensure that our electric bike is safe to work on. This means turning it off and disconnecting the battery to eliminate any risk of electrical accidents. It's also essential to position the bike on a stable and level surface so it won't tip over mid-process, causing potential damage or injury.
Furthermore, it's critical to double-check our tools. Make sure they're in good condition and fit for the task. A tool malfunction during the process could lead to mishaps that we definitely want to avoid.
Lastly, let's clear our workspace of any obstacles or hazards. A clean, clutter-free area will prevent tripping or slipping, ensuring a smooth and safe wheel removal process. Remember, safety is always our top priority, so let's take the time to get things right.
Understanding the Electric Bike Structure
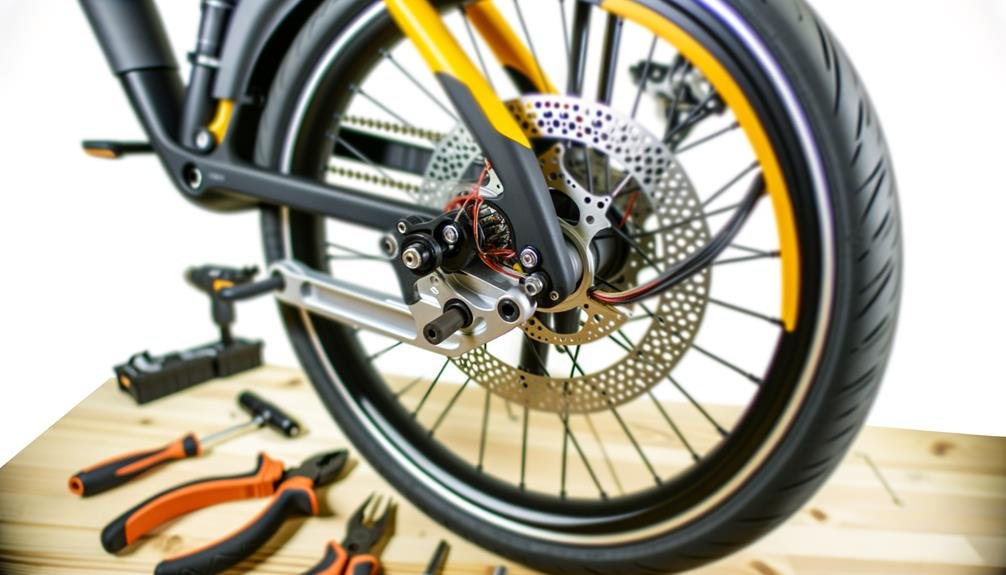
Diving into the structure of an electric bike, it's crucial to familiarize ourselves with key components like the battery placement and connection points, the motor and its elements, the rear tire's position in relation to the motor and chain, and the brake system. This understanding allows us to perform maintenance tasks like removing the rear tire with competence and safety.
Let's break down these components:
- Battery Placement: Usually located in the downtube, it's connected to the bike's system through specific connection points.
- Motor: This is the heart of your e-bike. It's crucial to understand parts like the motor cable, which connects the motor to the battery.
- Rear Tire: Its position in relation to the motor and chain is critical for efficient performance.
- Motor to Rear Tire Connection: The chain links the motor to the rear tire, enabling the conversion of electric power into mechanical power.
- Brake System: The alignment of the brake disc with the calipers is vital for effective braking.
Identifying the Rear Wheel
Identifying the rear wheel on your electric bike involves looking for key features such as its location behind the seat, its connection to the chain and gears, the presence of a cassette or freewheel, a disc brake rotor, and a thicker, longer axle compared to the front wheel.
When going about this task, look out for the chain and gears. They're attached to the rear wheel, which distinguishes it from the front wheel. Alongside this, the cluster of gears that the chain runs on, known as the cassette or freewheel, is another key feature of the rear wheel.
The rear wheel also typically features a disc brake rotor. This part, crucial for effective braking, is mounted on the hub of the wheel. If you're still unsure, check the axle. The rear wheel's axle is noticeably thicker and longer than the front wheel's.
For those of us with electric bikes, there's an additional tell-tale sign. Often, the motor of the bike is integrated into the rear wheel, making it distinctive.
Identifying the rear wheel is an essential step before proceeding with any maintenance or repairs. So, let's get it right!
Easing the Tension off Chain
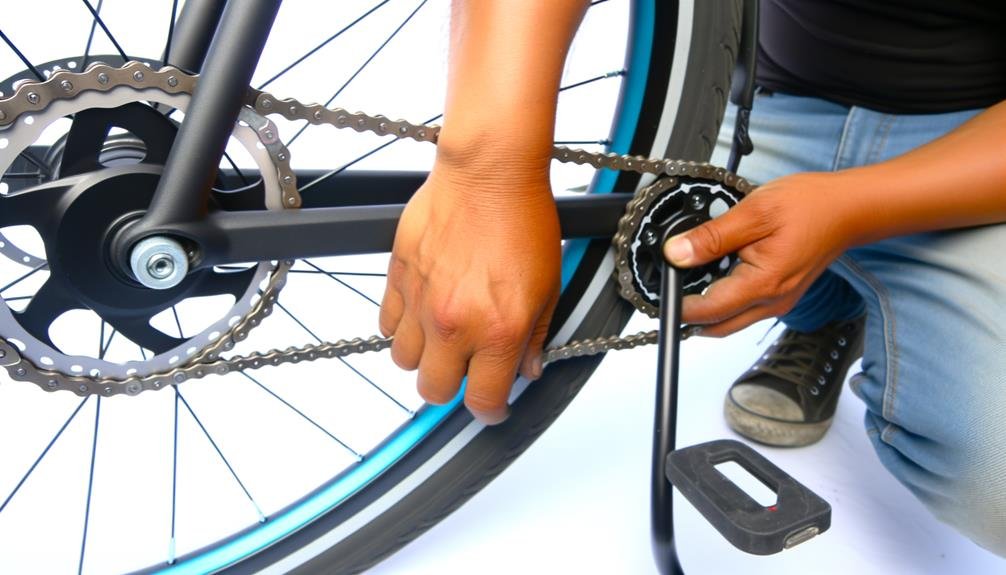
Before we proceed to wheel removal, it's essential to ease the tension off the chain by shifting to the smallest rear cog. This step is crucial as it reduces the stress on both the chain and the rear derailleur, thereby minimizing the risk of damage during wheel removal.
Here's a step-by-step guide for easing the tension off chain:
- Firstly, shift your gears to the smallest rear cog. This action helps to reduce the chain tension significantly.
- Next, carefully lift the rear wheel off the ground. This creates some slack in the chain, making the next steps easier.
- Gently move the wheel side-to-side while pulling the chain off the cog. This movement helps to further ease the tension.
- Ensure the chain is completely free from the chainring and the derailleur. This step is crucial to avoid any residual tension that can hinder the wheel removal process.
- Finally, guide the chain off the cassette gently. Be mindful of the chain's movement and ensure it's eased off without force.
Disconnecting the Electric Motor
With the chain tension now eased, we can turn our attention towards disconnecting the electric motor. The first step in this process is to locate the motor cable connected to the frame. After finding it, we'll need to unplug it carefully. Let's ensure the cable is free from any obstructions, such as brake pads, before proceeding.
| Steps | Details |
|---|---|
| 1 | Locate the motor cable |
| 2 | Unplug it carefully |
| 3 | Check for obstructions |
| 4 | Gently remove the motor |
It's important to take note of the motor cable's orientation as this will assist us when we reconnect it later. After we've successfully unplugged the motor cable, we can gently remove the motor and set it aside in a safe place. We must be cautious not to damage the motor cable or its connectors during this process. This step is crucial as it prevents any potential damage to the motor, ensuring our electric bike remains in prime condition.
Removing the Wheel Nuts

Now, we're moving on to the process of removing the wheel nuts.
It's crucial to have the right tools, like an 18mm wrench, and to remember the order of the washers as you take them off.
We'll also touch on the technique for loosening the nuts properly to ensure you don't damage your electric bike's wheel.
Tools for Nut Removal
Let's gather the necessary tools to remove the wheel nuts from your electric bike:
- an 18 millimeter wrench
- a 4 millimeter or possibly a 5 millimeter allen key
- a pair of snips
- if needed, a rubber mallet for those stubborn parts.
Here's a quick rundown of what each tool does:
- *18 millimeter wrench*: this is for loosening and removing the wheel nut.
- *4 millimeter allen key*: some electric bike models require this for wheel nut removal.
- *5 millimeter allen key*: this is for alternative wheel nut removal on specific models.
- *Pair of snips*: you'll need to cut any zap straps that secure the wheel or motor cable.
- *Rubber mallet* (optional): it helps in loosening stubborn parts during the nut removal process.
Now, let's get to work!
Proper Nut Loosening Technique
We're ready to dive into the proper technique for loosening the wheel nuts on your electric bike.
Firstly, using the right-sized wrench or allen key, turn the nuts counterclockwise to loosen them. It's important to note the order of the washers as you do this, so you can put it back correctly later.
Be sure to cut any zip ties or straps holding cables or components to the rear wheel before trying to remove it.
Lift the wheel out gently, ensuring the chain and cables are well-positioned and unplugged.
When you replace the wheel, align the washers, power cable, and derailleur properly. Securely tighten the nuts, and you're good to go.
Taking off the Rear Wheel
Before we begin, ensure the bike is stable by using braces and remove the battery to prepare for the rear wheel removal. You're going to need a few tools, so make sure you have them handy. Now, it's time to get down to business.
Here's what you're going to need to do:
- Use an 18mm wrench and a 4mm or 5mm Allen key to loosen and remove the nut on the rear wheel. Be careful to note the order of washers.
- Cut the zap strap holding the motor cable to the frame. Take care not to damage the cable.
- Unplug the motor cable. This will free up the wheel for removal.
- Tilt and push the wheel back to lift it out. Make sure the chain is laid upon itself to avoid tangling.
- Finally, when you're replacing the wheel, ensure the washer with the tooth is correctly positioned and that the disc lines up with the brake calipers before tightening the nut on the axle.
Checking for Potential Issues
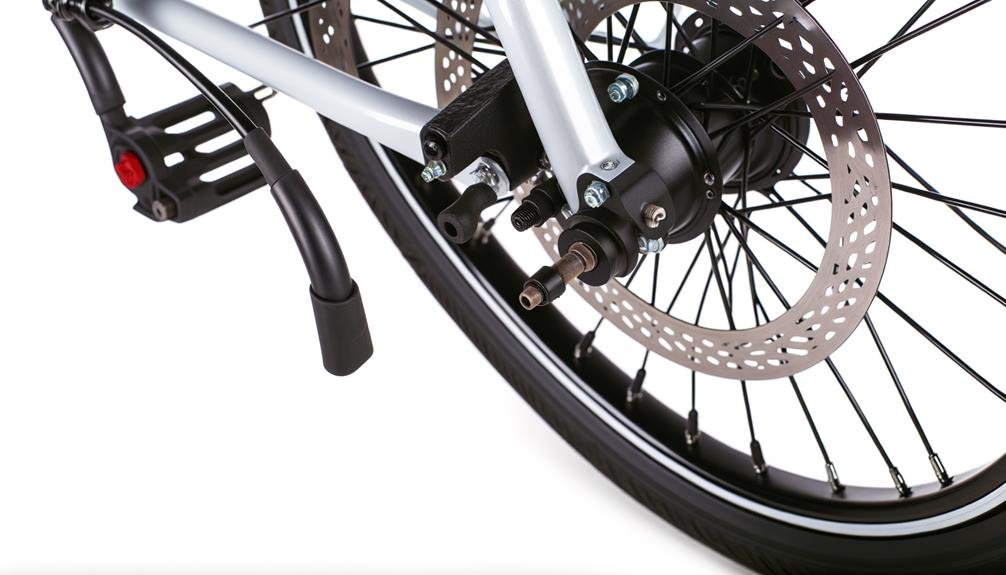
After successfully removing the rear wheel, it's crucial to scrutinize for any potential problems that could affect the performance or safety of your electric bike. So, let's dive in and see what we need to check.
Firstly, take a good look at the wheel axle and nuts. Are there any signs of wear or damage? If so, they'll need to be replaced to ensure your bike performs optimally.
Next, move on to the motor cable. Check it for any fraying or damage that could hinder its performance. A damaged motor cable can significantly affect your e-bike's functionality, so it's an issue that needs immediate attention.
Then, turn your attention to the brake calipers and disc. Make sure they're in good working condition and not showing any signs of wear. The brake is a critical safety component, so don't skip this step.
Check the alignment of the derailleur and ensure it moves smoothly. It's much easier to fix issues now than when the wheel is back on.
Lastly, keep an eye out for any loose or damaged parts that may need replacing. By paying attention to these details, we're ensuring our e-bike stays in top shape.
Reinstalling the Wheel Correctly
Having thoroughly inspected the necessary parts, let's now turn our focus towards correctly reinstalling the wheel on your electric bike. It's crucial to get this right for a smooth, safe ride. I'm going to guide you through the process, step by step, so you feel like you belong in the e-bike community with confidence and knowledge.
Let's start with the basics:
- Position the chain correctly: it needs to sit properly on the cassette and chainring. Misalignment can lead to unnecessary wear and tear or even a snapped chain.
- Ensure the wheel's orientation: it should be straight in the dropouts. A skewed wheel can impact your ride and safety.
- Secure the axle nut: tighten it well so the wheel is firmly seated in the frame. A loose wheel is a hazard.
- Mind the motor cable: reconnect it securely, ensuring it isn't pinched or twisted. A damaged cable can affect the bike's performance.
- Check the brake caliper: align it well and adjust to prevent any rubbing on the rotor. Poorly aligned brakes can reduce braking efficiency.
Frequently Asked Questions
Can You Remove the Wheel on an Electric Bike?
Yes, we can definitely remove the wheel on an electric bike. It's an essential part of wheel maintenance. We'll need some basic tools and a bit of patience, but it's a task we can accomplish together.
How Do You Release the Back Wheel on a Bike?
We'd start by disengaging the brakes. We'll then loosen the axle nuts using a wrench. It's important to carefully release the chain from the sprocket. Then, we can gently lift and remove the wheel.
How Do You Take the Back Wheel off an Aventon Ebike?
We've tackled Aventon maintenance before. It's like solving a puzzle. First, we'll release the bike's brake, remove the axle nuts, then gently lift the wheel off. Remember, it's all about patience and precision.
How Do You Remove a Rear Bike Wheel With an Axle?
We're tackling axle maintenance today, folks! To remove a rear bike wheel with an axle, we'll first unscrew the axle nuts. Then, we're gonna carefully slide out the wheel. It's a piece of cake, team!
Conclusion
And there you have it, folks! We've successfully navigated the labyrinth of the electric bike to remove and reinstall the rear wheel. Like seasoned sailors, we've charted the course, easing the tension off the chain, unscrewing the wheel nuts, and sailing smoothly on the sea of technicality.
Remember, safety is our compass and precision, our North Star. Now, with the wind of knowledge in our sails, we're ready to ride again – onward to more electrifying adventures!

Charles Miller is a veteran bike enthusiast with over 12 years of experience dealing with bikes as a mechanic. Despite immense love and expertise for his Tacoma, he rides his Trek Ebike more. Anytime you meet him, you’ll either hear him talking about Bikes, or writing about all things bikes and cars on this blog.
More Posts
