Charles Miller is a veteran bike enthusiast with over 12 years of experience dealing with bikes as a mechanic. Despite immense love and expertise for...
Just as a conductor directs an orchestra to create harmonious music, an ebike controller guides the motor and battery to produce smooth, efficient power.
We're here to unravel the intricacies of connecting an ebike controller, an essential skill for any electric bike owner or enthusiast. From identifying the right wires to securing the controller to your bike, we'll walk you through each step.
But don't worry, we won't leave you stranded halfway. Stick with us and you'll be navigating this complex symphony with ease, even if the process throws a few unexpected notes your way.
Key Takeaways
- The brushless DC motor controller is essential for electric bikes and scooters.
- Properly preparing the workspace and having the right tools are crucial for a successful installation process.
- Connect the main power connector, throttle cable connector, Hall sensor connector, and three-phase power cable in the correct order for efficient connection.
- Securely fasten the controller onto the bike frame and ensure all wires can reach their respective connectors without strain.
Understanding Your Ebike Controller
Diving into the heart of your eBike, the brushless DC motor controller, often found inexpensively on platforms like eBay, plays a pivotal role in the operation of electric bikes and scooters. As a community of eBike enthusiasts, we understand the value of getting to know the intricate components of our electric bikes.
The controller, you'll find, connects to the battery through the main power connector. This connector consists of two big wires for positive and negative, along with a smaller wire for the switch. It's crucial to ensure these are properly connected to avoid potential damage or subpar performance.
Next, we'll look at the throttle cable connector, controlling the motor's speed. It typically has three wires: positive, ground, and signal. It's vital to test this component for correct functionality.
Finally, the Hall sensor connector, which detects the position of the motor's rotor, usually has five wires. These include three signal wires colored blue, green, and yellow. This connector's correct functioning is paramount for the smooth operation of your electric bike's motor.
Understanding your eBike's controller components can help ensure a more efficient and enjoyable ride.
Gathering Necessary Tools
Before we start connecting the Ebike controller, we need to ensure we've the right tools on hand. This includes not only the essential components such as a suitable brushless DC motor controller, but also the appropriate cables and connectors.
Moreover, a well-prepared workspace is key to a smooth and successful installation process.
Essential Toolkit Components
To connect an Ebike controller effectively, we'll need a few essential tools. These tools aren't only applicable to electric bikes but also to electric scooters.
The following is a list of the items you'll need:
- Brushless DC motor controller: This is a crucial component for power management and motor control.
- Google Translate app: This tool will assist with translation of instructions or labels that might be in a different language.
- Testing equipment: This includes a multimeter or similar device for assessing the controller's performance and ensuring its proper functioning.
Join us as we delve deeper into the specifics of each component.
Preparing Your Workspace
In preparing our workspace, we'll first gather the necessary tools, starting with the brushless DC motor controller, a key component for our electric bike or scooter. This is a critical step in ensuring our e-bike functions optimally.
You can find these controllers on platforms like eBay for a cost-effective solution. Be aware, you may encounter controllers without user manuals or with manuals in different languages. Don't fret, we're in this together. Use the Google Translate app to aid in translating labels and instructions if needed.
It's essential to test the controller before installation, confirming its proper functioning. By being prepared and organized, we're paving the way for a successful ebike controller connection.
Identifying Controller Wires
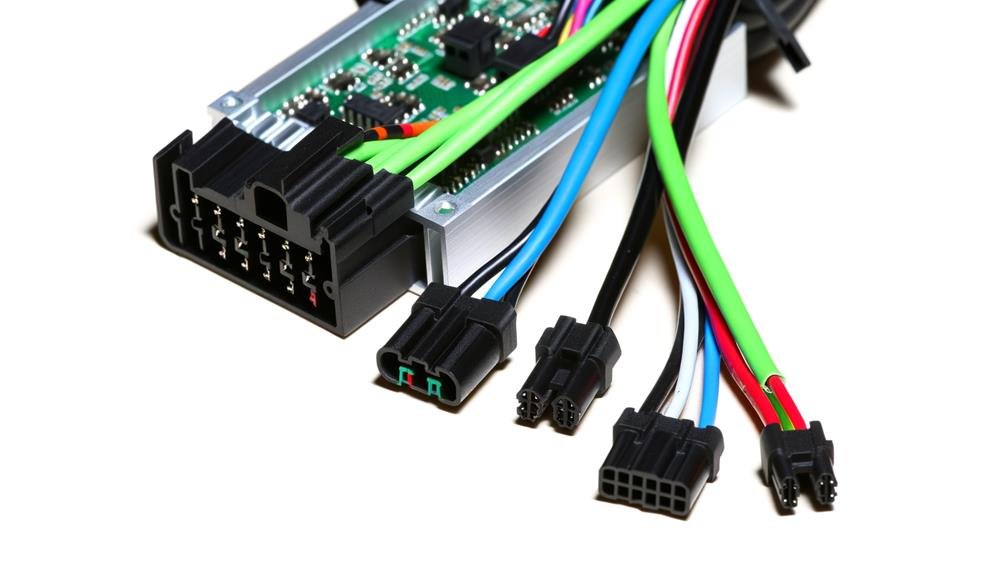
Wondering how to identify the different wires on your ebike controller? Let's delve into this together.
Your ebike controller has multiple wires, each with its own function. Identifying them correctly is paramount to a successful connection.
- Main Power Connector: This typically has three wires. Two large ones signify positive and negative, with a smaller one for the switch.
- Throttle Cable Connector: This connector usually has three wires, too. Positive, ground, and signal are the standard, with additional wires for power buttons or voltage displays in some models.
- Hall Sensor and Three-Phase Power Cable: The hall sensor connector typically has five wires – ground, positive, and three signal wires (blue, green, and yellow). The three-phase power cable consists of three wires matching the colors of the signal wires. Matching these colors with the corresponding wires on your controller is crucial.
Connecting the Controller to the Motor
Once you've successfully identified the different wires on your ebike controller, it's time for us to connect the controller to the motor, ensuring every wire is properly matched and secured. This step is crucial to ensure your ebike functions smoothly and gives you the desired miles per ride. Let's get started.
Begin with the main power connector. This connector, with its three wires, is responsible for linking the controller to the battery. It's crucial to match the wires correctly for efficient power transmission.
Next, focus on the throttle cable connector. This three-wire connector controls the motor's speed, directly affecting your ebike's miles per hour.
Now, let's move to the Hall sensor connector. This five-wire connector detects the motor's rotor position, influencing the precision of the motor's movements.
Lastly, the three-phase power cable needs to be connected. This cable, consisting of three wires, links the controller to the brushless DC motor, dictating the ebike's performance.
Securing the Controller Onto the Bike
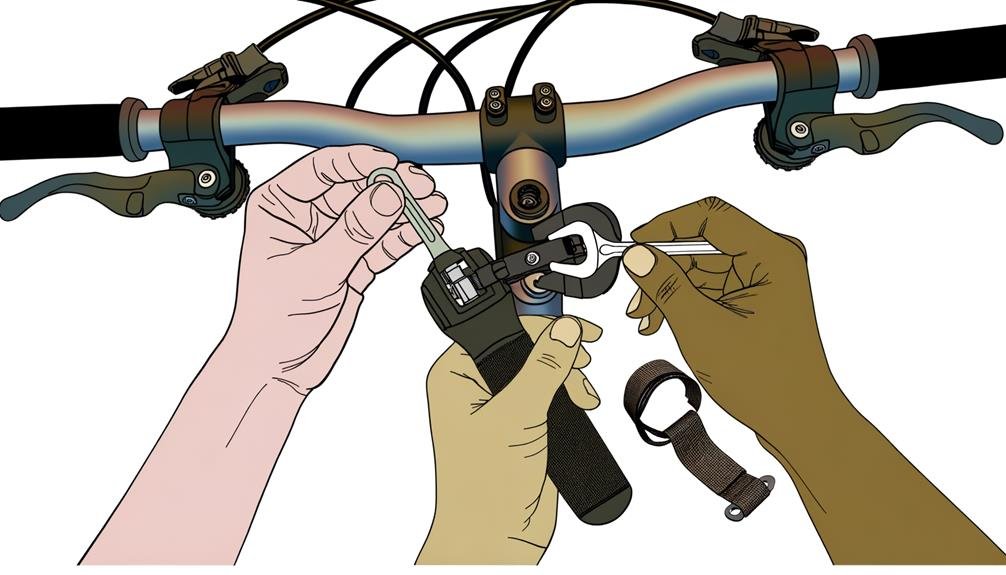
After ensuring all wires are correctly connected, it's essential to securely fasten the controller onto the bike frame using zip ties or mounting brackets, a step that prevents unwanted movement during rides. This secure placement reduces the risk of accidental disconnections and potential damage to the controller.
When securing the controller, it's crucial to consider ventilation. Controllers generate heat, so placing them in a well-ventilated area is vital to prevent overheating and prolong their lifespan. It's also necessary to double-check that all wires can reach their respective connectors without strain.
Adding a layer of foam or rubber padding between the controller and the bike frame can absorb vibrations and protect the controller from damage. It's a simple yet effective way to add an extra layer of security to your eBike setup.
In summary, to secure the controller onto the bike:
- Use zip ties or mounting brackets to fasten the controller onto the bike frame.
- Ensure the controller is in a well-ventilated location.
- Consider using foam or rubber padding for additional protection.
Testing the Controller Connection
Having secured the controller onto the bike frame, we can now turn our attention to ensuring the controller connection is functioning correctly. This is crucial for those of us who desire to cruise long distances without interruption.
First, we examine the main power connector. It has three wires: positive, negative, and a switch. To prevent battery drain, we must ensure the system is off before proceeding.
Next, we inspect the throttle cable connector. It also has three wires: positive, ground, and signal. By turning on the switch, we activate the throttle and voltage display.
Our next point of focus is the Hall sensor connector. This typically has five wires and must be properly connected for accurate motor operation.
Lastly, we look at the three-phase power cable. This connects the controller to the motor. Matching colors are necessary for proper functioning. Notably, if the motor spins backward, we can resolve this by swapping the green and yellow wires.
This thorough check ensures our connection is solid and ready for those long distances. This way, we aren't just riders, but part of a community that values precision and reliability.
Troubleshooting Common Connection Issues
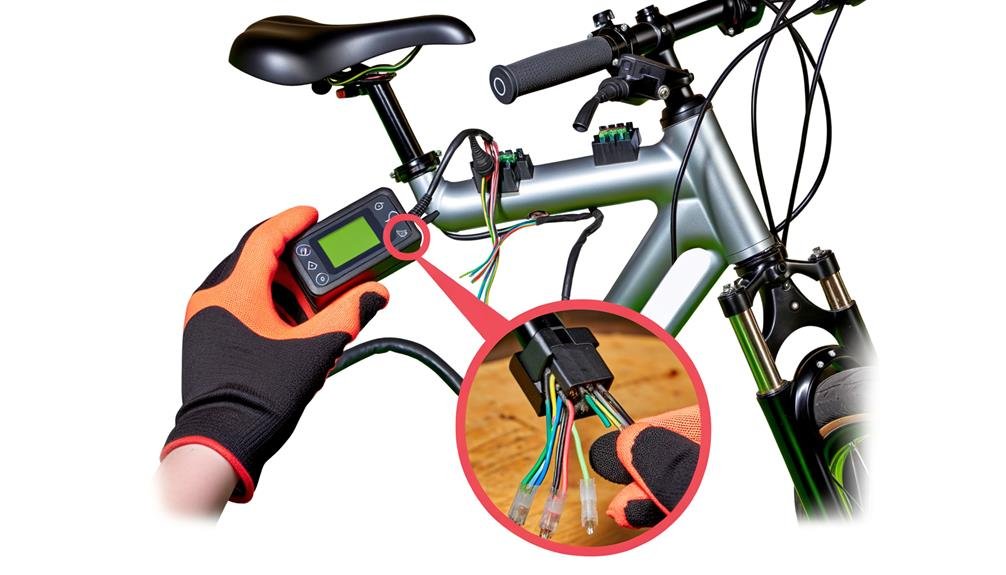
While we've ensured our controller connections are secure and accurate, it's also essential to know how to troubleshoot common issues that may arise during our ebike adventures. Even a little bit of knowledge can go a long way in keeping our bikes running smoothly.
- Controller Functionality: Always test the controller before installation to ensure it's functioning properly. This step can save us from unnecessary headaches down the line.
- Battery Drain: Remember to turn off the system when not in use. The controller can potentially drain the battery if left on due to phantom load. It's an easy, yet often overlooked step in maintaining our ebikes' longevity.
- Throttle Activation and Motor Operation: Make sure the signal wire is correctly connected to the switch's positive to activate the throttle. Also, ensure the Hall sensor wires are accurately connected for proper motor operation. If the motor spins backward, despite correct color matching, swapping the green and yellow wires might resolve the issue.
Troubleshooting doesn't have to be a daunting task. With these tips, we're well-equipped to handle any common connection issues that come our way, keeping our ebike adventures smooth and enjoyable.
Frequently Asked Questions
What Is the Average Lifespan of an Ebike Controller?
We've found that with proper controller maintenance, an ebike controller's average lifespan can range from 3-5 years. It's important we keep it clean and avoid extreme weather conditions to prolong its life.
How Do Weather Conditions Affect the Performance of an Ebike Controller?
"We've noticed that extreme weather conditions can impact controller performance. Regular controller maintenance helps us counteract this. Cold can slow response times, while heat might cause overheating. Moisture could lead to internal corrosion."
Can I Use Any Type of Ebike Controller on My Specific Bike Model?
We're afraid not. Controller compatibility isn't universal. It's crucial to ensure the controller matches your ebike's specifications. We're all in this journey together, so let's make sure we choose the right components for our ebikes.
Are There Wireless Options Available for Ebike Controllers?
Yes, there are wireless options available for ebike controllers. We're seeing more controller customization these days, allowing us to enjoy a clutter-free handlebar. It's like we're all part of this exciting tech evolution, isn't it?
What Are the Energy Consumption Rates of Different Types of Ebike Controllers?
We're navigating the energy highway here! Different ebike controllers have varied controller efficiency. Brushless controllers consume less energy. However, brushed ones, while cheaper, use more power. Let's all be energy-wise bikers, shall we?
Conclusion
So, we've wired up our ebike controller, matching color for color, signal for signal. We've tightened, secured and tested, ensuring the hum of the motor responds to our command.
Now, we can feel the wind on our faces, hear the soft whir of the electric motor beneath us. We've troubleshooted any issues, our ride is smooth, our control precise.
We've successfully connected our ebike controller, and now, the open road is ours to explore.

Charles Miller is a veteran bike enthusiast with over 12 years of experience dealing with bikes as a mechanic. Despite immense love and expertise for his Tacoma, he rides his Trek Ebike more. Anytime you meet him, you’ll either hear him talking about Bikes, or writing about all things bikes and cars on this blog.
More Posts