Charles Miller is a veteran bike enthusiast with over 12 years of experience dealing with bikes as a mechanic. Despite immense love and expertise for...
Changing an electric bike tire is as intricate as performing open-heart surgery, but we've mastered the art and we're here to guide you through the process.
It's not just about replacing an old, worn-out tire, it's about ensuring your safety and extending the longevity of your e-bike.
With the right tools and our step-by-step guide, you'll be able to conquer this task with confidence.
But remember, there are a few essential details you must not overlook, and we'll reveal them as we move along, so stick with us.
Key Takeaways
- Gather all necessary tools and prepare the bike before starting the tire changing process.
- Power down the e-bike system and remove the battery pack before removing the wheel.
- Carefully deflate and separate the tire from the rim using tire levers, being mindful of not causing damage.
- Ensure proper alignment and secure attachment when installing the new tire, and thoroughly check for punctures or damage before re-inflating.
Gathering Necessary Tools
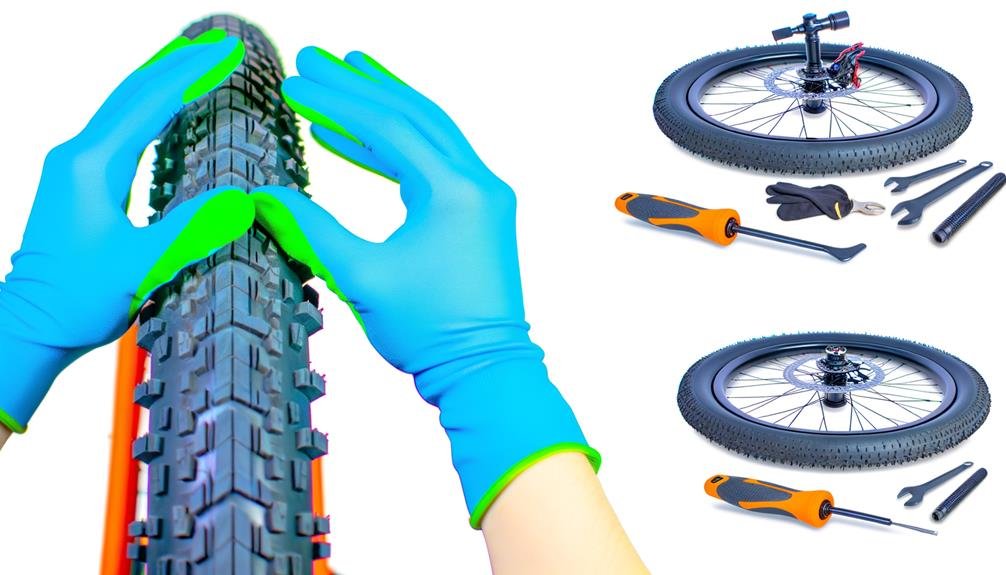
Before we dive into the process of changing electric bike tires, we need to gather a few essential tools:
- tire levers
- a bike pump
- a torque wrench
- a wrench set
- a patch kit
- a set of allen wrenches
- a screwdriver
- a pair of pliers
- a rag or towel
- gloves
- a small container for storing small parts.
These tools will ensure the successful removal and replacement of the rear wheel.
Tire levers aid in removing the tire from the wheel rim and the bike pump is critical for inflating the new tire.
The torque wrench and wrench set, along with the allen wrenches and screwdriver, are essential for adjusting and tightening the bolts and screws that hold the rear wheel in place.
The pair of pliers comes in handy for pulling out any stubborn nails or debris lodged in the tire.
The rag or towel is crucial for cleaning and wiping down parts, as well as protecting the work surface.
Gloves provide protection for our hands during this process, while the small container is perfect for safely storing small parts and hardware, preventing loss.
In this way, we're fully prepared to tackle the task of changing our electric bike tire.
Removing the E-Bike Wheel
With our necessary tools now at hand, let's power down the system and start the process of removing the e-bike wheel. The first step in our endeavor is to ensure safety. We turn off the electric bike system and carefully remove the battery pack. This prevents any possible electrical mishaps during our task.
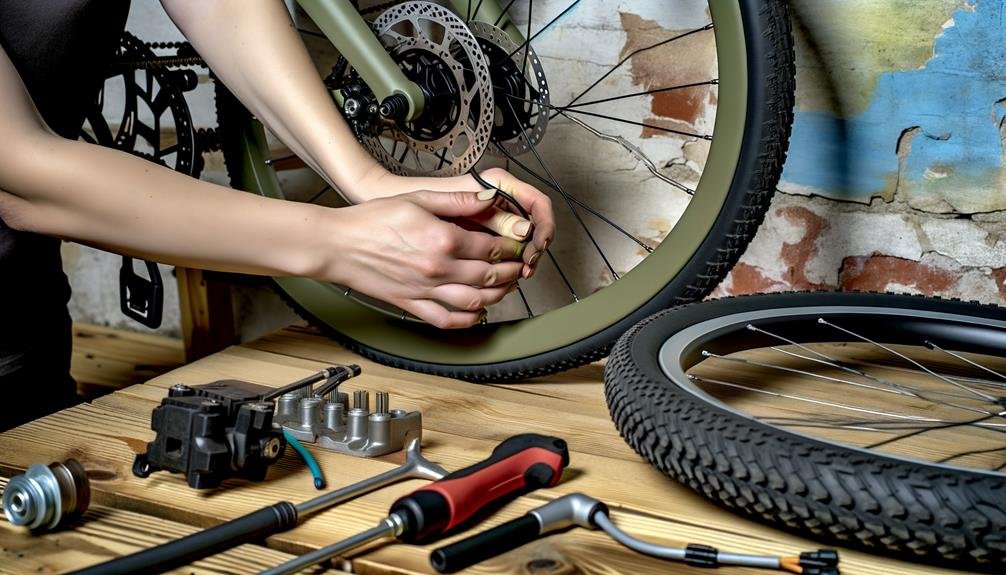
Next, we'll need to loosen the bolts on each side of the wheel. We use a suitable wrench to do so. Once we've loosened the bolts, we gently wiggle the wheel to remove it from the dropout. It's important to do this with care so as not to damage any component of our electric bike.
Once the wheel is removed, we release excess air from the tire. Using our tire tool, we carefully remove one side of the tire. This step demands precision and patience to prevent any damage to the tire.
After this, we inspect the tube for punctures and repair or replace as necessary.
Deflating the Old Tire

Moving on to deflating the old tire, we'll need to use a tire pump or simply press the valve core to release air from the tire. This process is straightforward, but requires precision. Remember, safety is paramount, so make sure the bike is stable before you start.
Here's a four-step guide to guide you through the process:
- Position your tire pump on the valve and release the air. If you don't have a pump, press the valve core instead. This might take a bit longer, but it's equally effective.
- Make sure to deflate the tire completely. An underdeflated tire will make the next steps difficult. You can check the pressure gauge or squeeze the tire to confirm all the air is out.
- If there's still air left, you may need to remove the valve core. This will release any remaining air.
- Lastly, gently squeeze and roll the tire to help expel any trapped air. This step ensures the tire is fully deflated and ready for removal.
Deflating the tire might seem tedious, but it's a critical step in changing your e-bike tire. Follow these steps, and you'll have that old tire off in no time.
Separating Tire From Rim
Now that the tire is fully deflated, it's time to tackle the tire-rim separation, a crucial step in the tire changing process. We'll do this together, step by step. Start by positioning your bike upside down, stabilizing it with the handlebars and saddle. Make sure the bike is in its highest gear for easy maneuverability.
Next, we'll need to use a tool called a tire lever. Insert the curved end of the lever between the rim and the tire bead, the part of the tire that comes into contact with the rim. Once inserted, push down on the lever, prying the tire bead over the lip of the rim.
Be careful not to damage the rim or the tire bead as you do this. We're all in this together, and we don't want to cause any unnecessary damage. Once you've gotten one section of the bead over the rim, work your way around the rest of the tire. It'll be tough, but with patience and careful work, we'll get it done.
Installing the New Tire

Now we're ready to tackle the installation of the new tire.
We'll start with the preparation of the tire, ensuring it aligns correctly with the rim for optimal seating.
Then we'll move on to securely attaching the replacement, using tire levers and carefully inflating to the manufacturer's recommended pressure.
Preparing the New Tire
After ensuring your new tire is ready, let's carefully line up the tube under the tire, making sure to fasten the retaining screw and position the valve correctly.
Here's a quick, 4-step guide to help you prepare your new tire:
- Gently massage the tire bead back onto the rim, ensuring it's fully installed on both sides.
- Inflate the tire to the recommended pressure. You can do this either before or after reattaching the battery pack.
- Align the small notch on the motor with the dropout, using the derailleur to guide the wheel back into place.
- Reattach all cables, and use zip ties to secure the wheel, ensuring the tire and wheel are properly aligned.
We've got this, team! Let's get you back on the road in no time.
Securing the Replacement
Having prepared the new tire, we're ready to move on to securing it onto the wheel rim. This step is really important, as it ensures your e-bike's efficiency and safety.
Carefully align the new tire with the wheel rim. This alignment is crucial for a proper fitting.
Next, use tire levers to gently ease the tire bead over the rim. Be cautious not to pinch the new tube during this process.
Afterward, double-check that the tire bead is evenly seated on both sides of the rim. This ensures a balanced installation.
Re-inflating and Checking
Once we've installed the new tire, it's time to turn our attention to re-inflating and checking.
We'll use a pressure gauge to ensure the tire is inflated to the correct PSI, following the manufacturer's guidelines.
After that, we'll conduct a thorough inspection for potential punctures or other types of damage, making sure the tire is ready for a smooth, safe ride.
Tire Re-inflation Process
To ensure your electric bike's optimal performance, we'll first use a pressure gauge, a handy tool, to confirm the current air pressure in the tire. This initial step makes it easier to proceed with the re-inflation process.
Here's our simple 4-step guide:
- Re-inflate the tire to the recommended PSI, as indicated on the tire sidewall.
- Conduct a thorough visual inspection for signs of damage or embedded objects.
- Test for leaks by submerging the inflated tire in water and watching for bubbles.
- Lastly, spin the wheel to confirm smooth rotation and check for any tire wobbles or bulges.
We hope this guide empowers you to maintain your electric bike's tires effectively, fostering a sense of community among electric bike owners.
Checking for Punctures
Before we delve deeper into the process, let's first use a tire pressure gauge to accurately assess the current air pressure in the tire, as this will be a crucial step in identifying potential punctures.
Now, onto a quick overview of puncture detection. We'll visually inspect the tire surface for any clear signs of damage or punctures.
Next, we'll reinflate the tire using a bike pump until we reach the recommended pressure level.
To spot hidden punctures, we'll submerge the inflated tire in water and look for any escaping air bubbles.
If we spot bubbles, we'll mark the puncture spot for repair or replacement.
Reattaching the E-Bike Wheel

Let's start reattaching the E-Bike wheel by aligning the small notch on the motor with the dropout. This is an essential first step that ensures the wheel fits perfectly onto the bike frame. It's a precise task that needs careful attention, but don't worry, we're in this together.
Here's a simple guide on how we'll do it:
- Align the small notch on the motor with the dropout. This is where I'm going to start. The notch and the dropout should fit together like puzzle pieces.
- Next, we'll use the derailleur to guide the wheel back into its place. It's crucial to line it up properly to avoid any future issues.
- After that, let's double-check that the tire is properly aligned on the rim. This ensures a smooth ride once we're back on the road.
- Lastly, we'll reattach cables and zip ties to secure the wheel in place. This step offers the much-needed reinforcement for stability and safety.
Frequently Asked Questions
How Do You Take an Ebike Tire Off?
"We're removing obstacles for taking off an ebike tire. We loosen the bolts, wiggle the wheel free, release air, and use a tire tool to carefully remove the tire. Inspecting the tube for punctures comes next."
How Do You Fix a Flat Tire on an Electric Bike?
We're addressing the issue of fixing a flat tire on an electric bike. Focusing on 'Flat Prevention', we'd inspect the tube for punctures, repair or replace it, then carefully reinstall and inflate the tire.
Do You Need Special Tires for Ebikes?
We don't necessarily need special tires for ebikes, but puncture-resistant options enhance ebike tire durability. Kevlar-lined tires or thicker inner tubes reduce punctures, ensuring we enjoy our rides without frequent maintenance worries.
Do Ebikes Get Flat Tires?
Yes, we can confirm that ebikes do get flat tires due to various factors such as punctures and wear and tear. Proper maintenance and understanding of ebike tire durability can help prevent these incidents.
Conclusion
And there we've it, folks! Changing an electric bike tire may seem like a tough nut to crack at first, but with the right tools and a bit of elbow grease, it's a piece of cake.
Remember, the devil is in the details, so ensure all bolts are tightened and the tire is properly aligned to avoid any hiccups on the road.
After all, it's better to be safe than sorry.
Keep your wheels spinning and enjoy the ride!

Charles Miller is a veteran bike enthusiast with over 12 years of experience dealing with bikes as a mechanic. Despite immense love and expertise for his Tacoma, he rides his Trek Ebike more. Anytime you meet him, you’ll either hear him talking about Bikes, or writing about all things bikes and cars on this blog.
More Posts


